Thursday, January 29, 2015

best of the nest link party - december/january


Welcome to the first BOTN of 2015! I hope you're invigorated and ready to start the
year off with some new projects - I can't wait to see what you've been up to!
I'm happy to share that we're starting the new year with a fun surprise ~ each month
 we'll be featuring a favorite blogger as a guest host!  

Our first Guest of the Nest,  Becky @ This is Happiness,
 if you're not familiar Becky is the sweetest mom of two young children, her design and
 photography skills are top notch and always keep me coming back for more. Check out
her awesome magazine features (yes, plural) here ~ Yay, Becky!! 
I know you'll love her too!  

I love her tradition of Sunday dinner in the dining room to counteract the
  busyness of weekday dinners with her kiddo's schedules. She shares awesome
ideas that are special but simple enough to make it doable and fun for everyone.   
Becky @ This is Happiness 

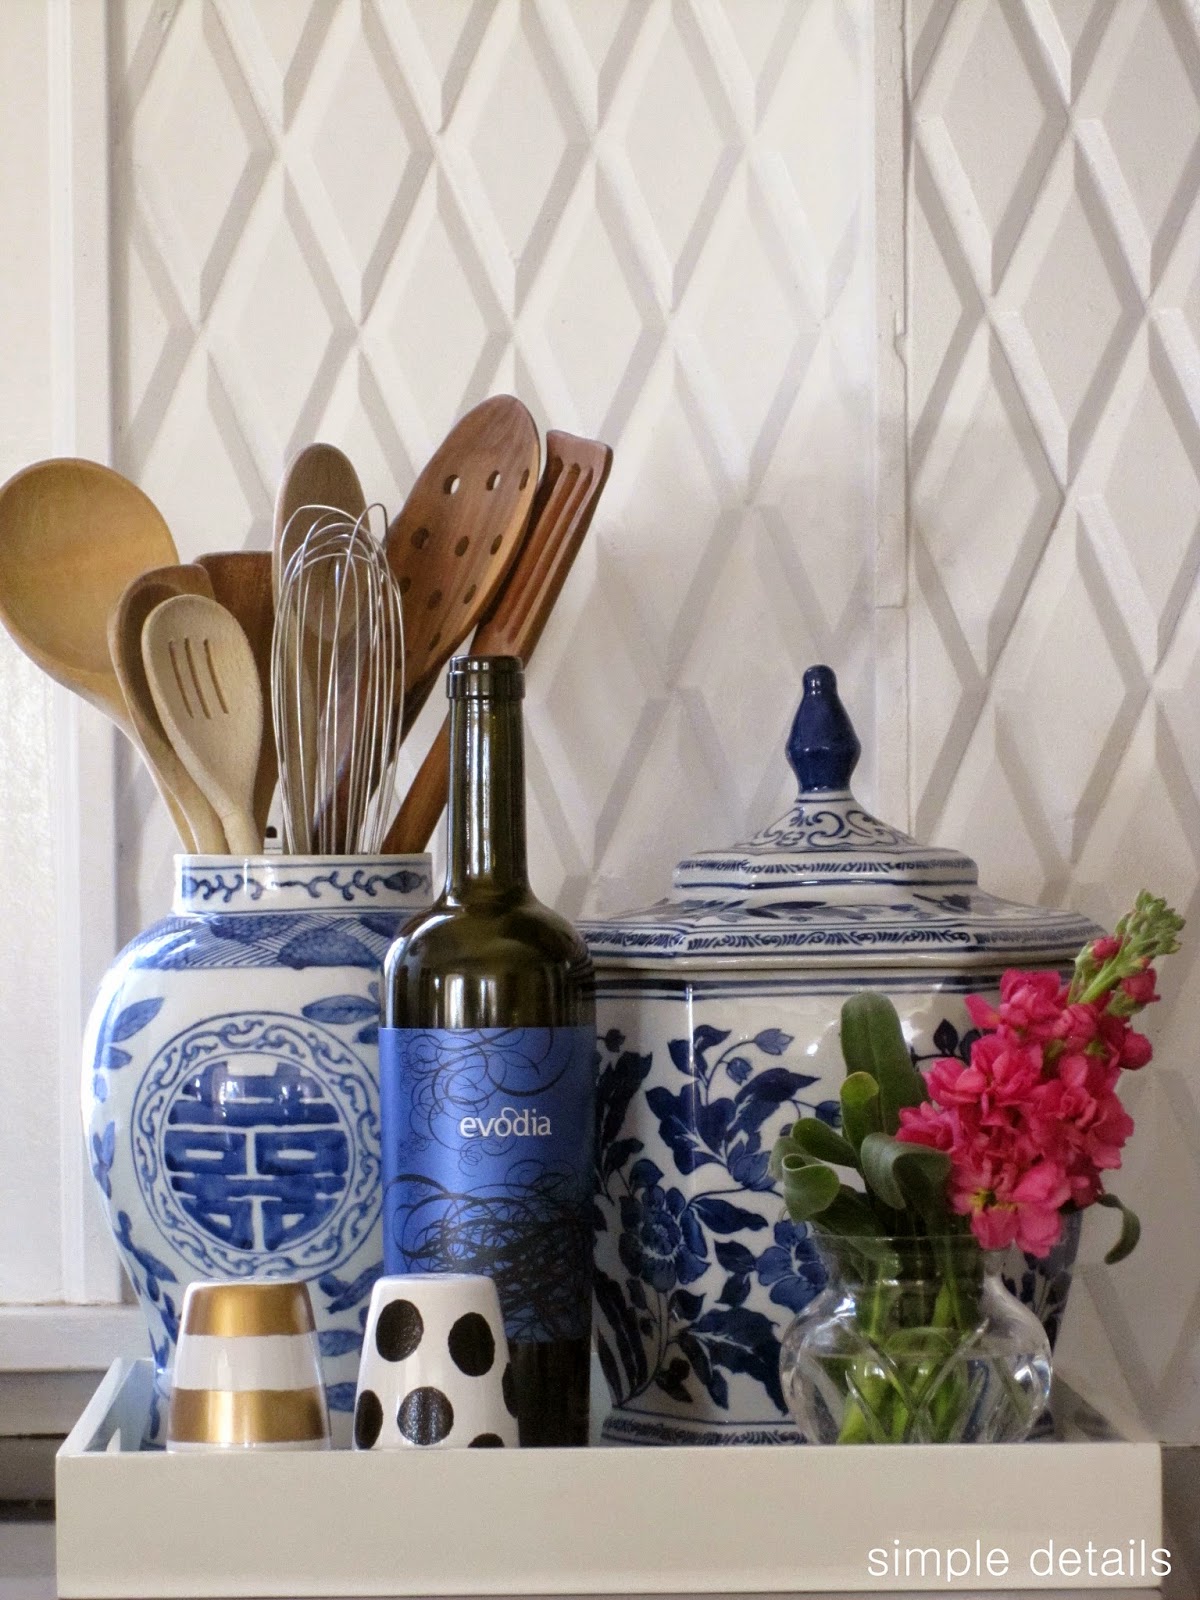
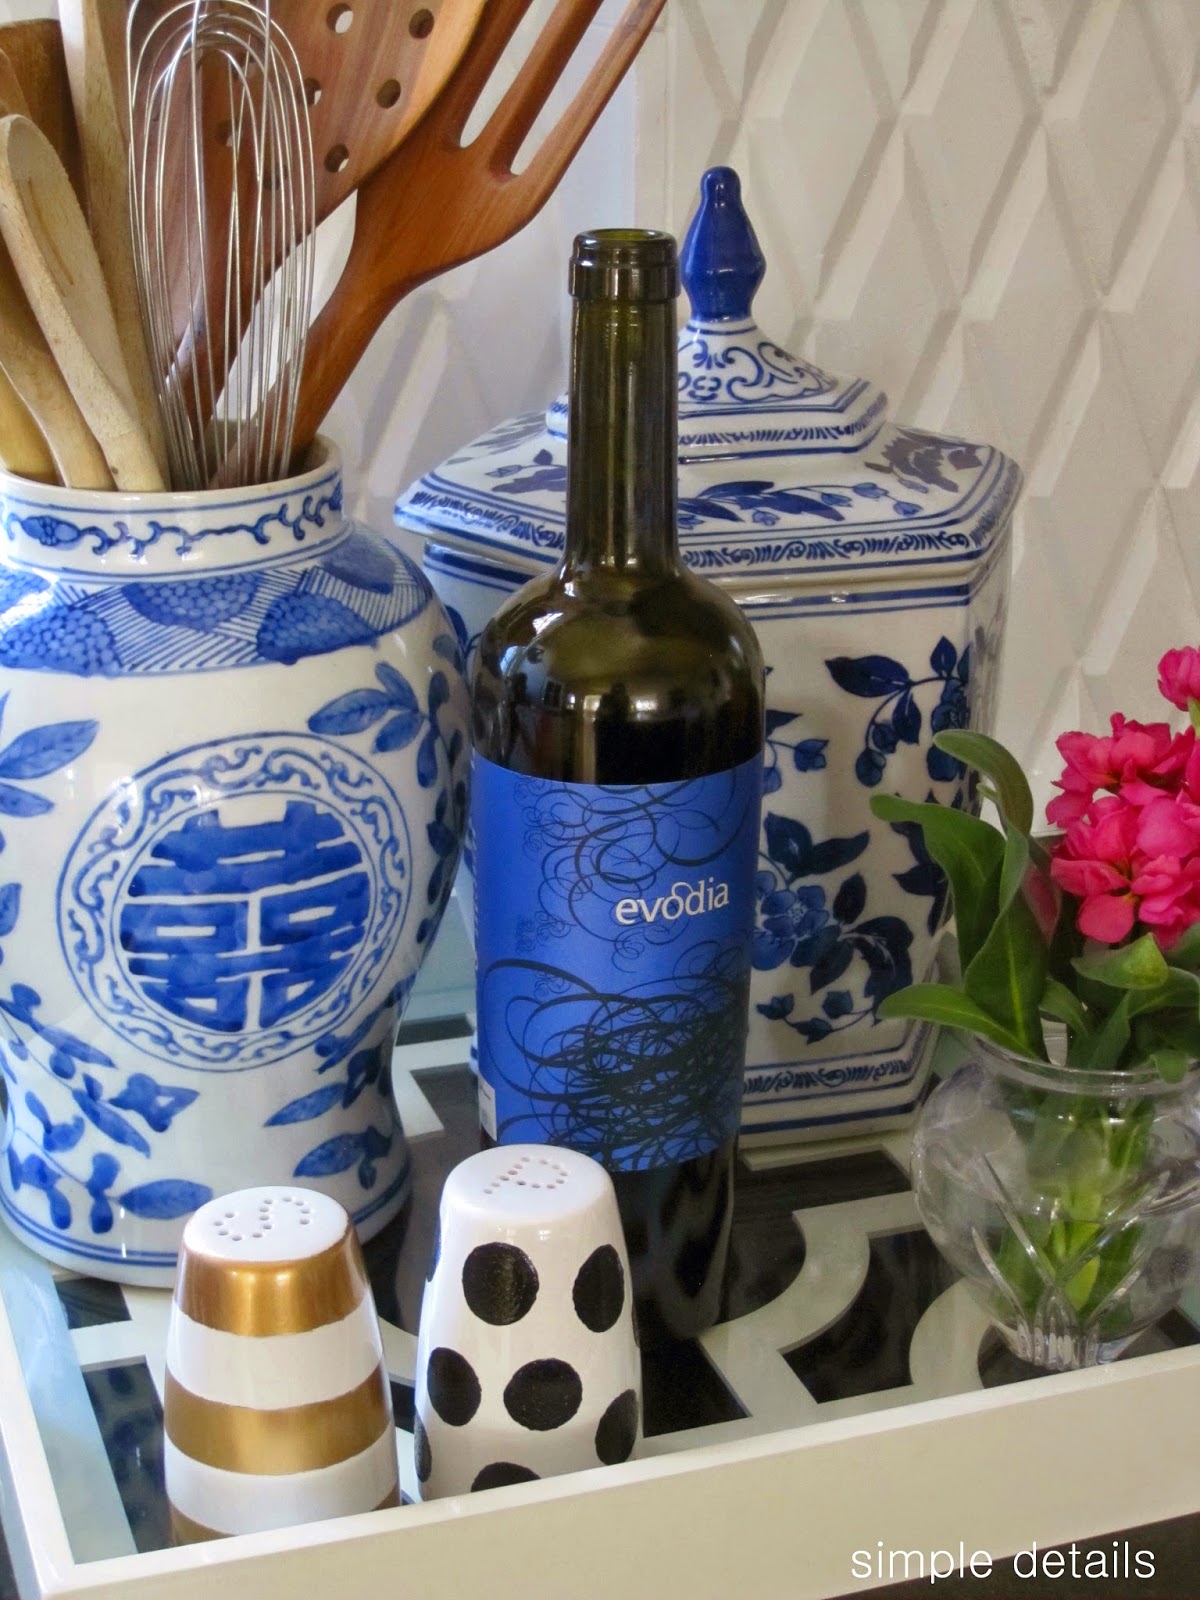
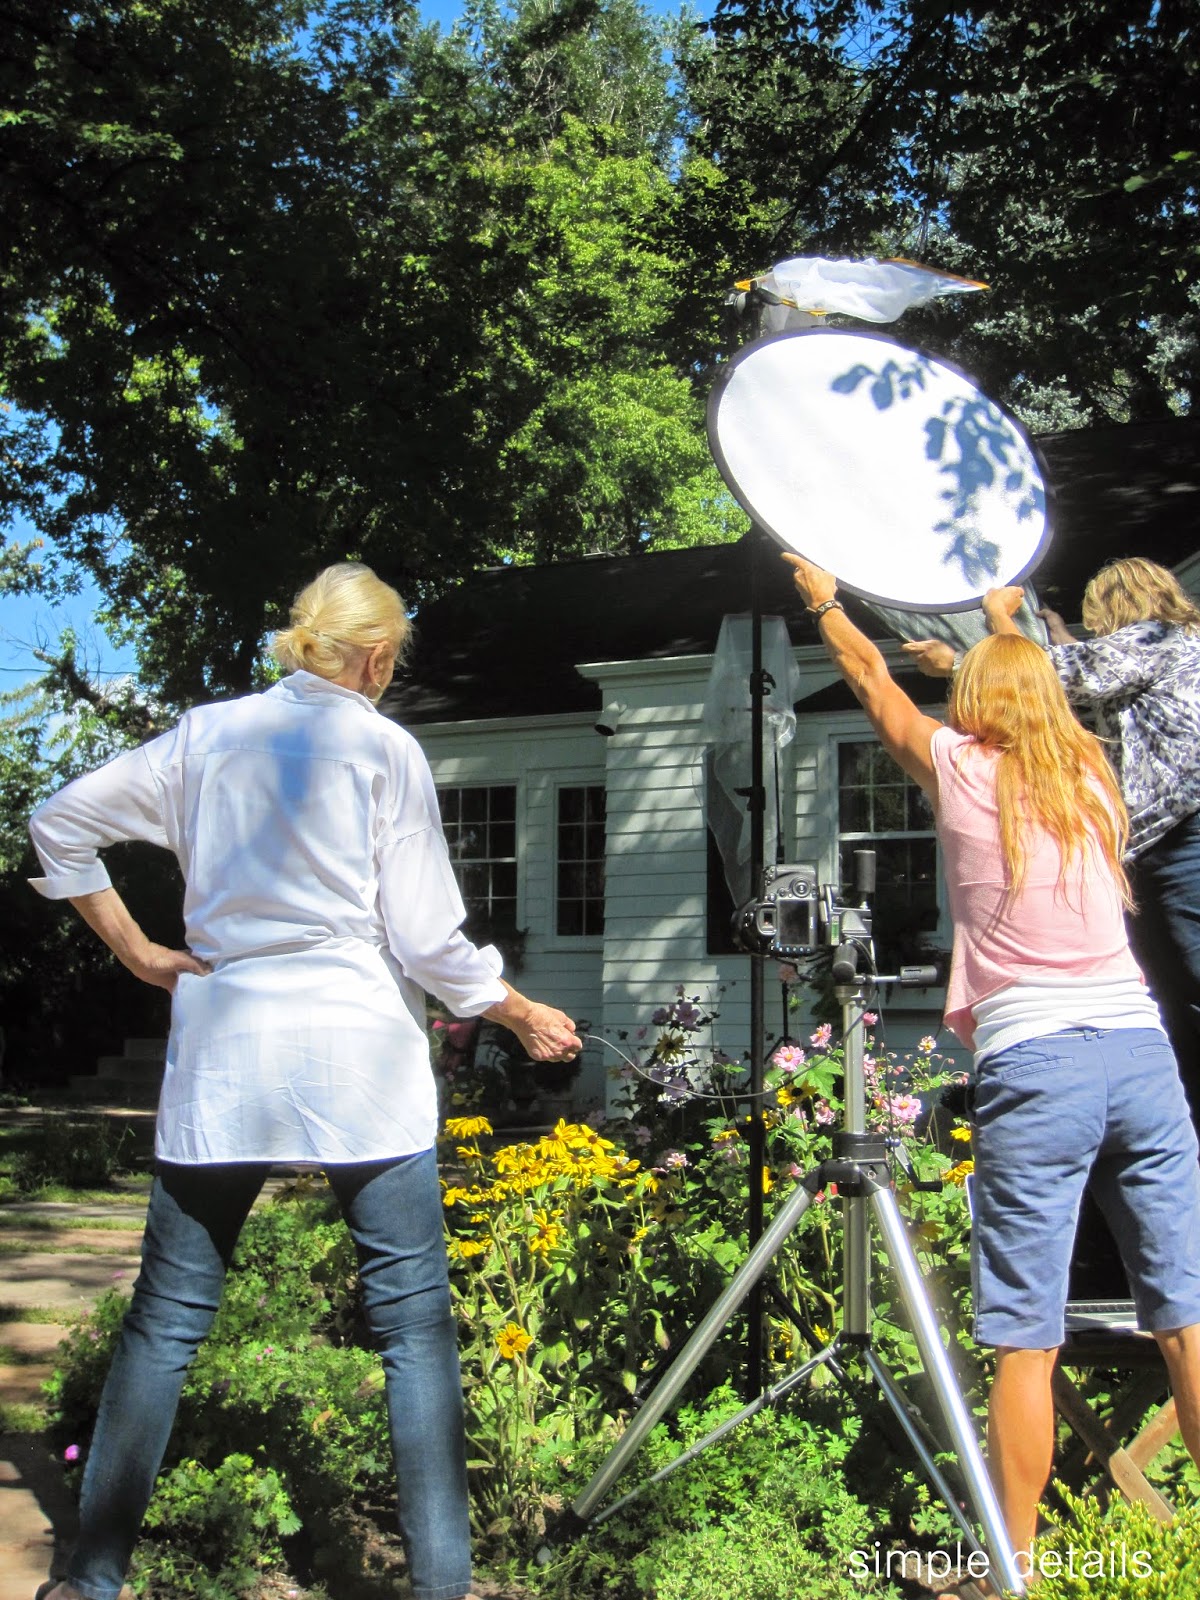
I finally revealed a secret I've been keeping for over a year...a dream come true,
 our exterior, yard and deck are featured in this month's BH & G Refresh Magazine.  
 Pam @ Simple Details


Lisa shared her family room update and beautiful new sectional, rug and curtains that
 are key pieces in her quest for a neutral background so she can hoard pillows, and
 change everything up on a whim!  
 Lisa @ Shine your Light
Blog | Pinterest | Facebook | Instagram | Bloglovin' | Twitter

While reorganizing her kitchen Kris created a charming coffee station on this narrow counter.
I'd happily get up early to make everyone coffee in this pretty and organized space!
 
  Kris @ Driven by Décor

Jennifer upped the glam factor in her kitchen with a gorgeous makeover
including new hardware, lighting, and freshly painted cabinets - a must see! 
 Jennifer @ Dimples & Tangles

 Now it's your turn:
Bring your Best of December or January
Anyone can enter - not just bloggers!
Enter through Instagram by using hashtag #bestofthenestparty and tagging at least one of your hosts.

Only ONE link per person to show your best work from December 2014 or January 2015
Additional links will be deleted.
If you're linking up with a blog, link back with a text link or grab the party button.


We'd love you stop back next Friday
 when Becky, Lisa, Kris, Jennifer and I will feature our favorite links.


Tuesday, January 27, 2015

Kate Spade Knock Off Salt & Pepper Shakers


You may have seen my Kate Spade Salt & Pepper Shakers I keep on the tray in my
 kitchen ~ the fun black, white and gold set. I always get asked where they're from, 
 they were a gift from a friend and I love them! (Btw, I shared her fabulous home here)
You can find them at Kate Spade here.
Fairmount Park Dot/Stripe Salt & Pepper Set
 $30.00

~ OR ~

you could DIY yourself a set using paint and white shakers from Target! 


Original Kate Spade Fairmount Salt & Pepper Shakers 

Target 


SUPPLIES:
Rubbing Alcohol
Martha Stewart Liquid Gilding - Gold
Martha Stewart Multi Surface Craft Paint - Beetle Black High Gloss 
Small Brush, Round Foam Pouncer 

STEP 1: 
Tape off your stripes.
I cut my tape at 3/4" width using the edge of a cutting mat as a guide and ran my xacto
 knife along the edge for a clean line.


This shaker tapers at the top, so you'll have to work with the tape a bit where there is a
 slight gap - I just used my nail to firmly press the tape against the glass to secure well. 


STEP 2:
Paint the stripes.
I took the plug out of the bottom and put my finger in there to hold the shaker
while painting stripes.
Using a small brush (about 1/2" - 3/4" wide bristles) apply the Liquid Gilding on the glass,
 after dipping your brush in the gilding wipe the excess on the edge of the jar.
 Do your best to apply one coat and don't go over what you've already painted.  
If I were a good blogger I'd have a picture of this for you!
 Sorry, it went so quickly I completely spaced the photo! 

STEP 3:
Paint the dots.
Wipe the shaker with rubbing alcohol per instructions on Multi Surface Paint. 
Put a small amount of paint in a container to dip your pouncer into, remove any
excess paint on a paper towel, press the foam pouncer completely against the glass to
deposit the paint. 


A couple things:
The Multi Surface Paint is dishwasher safe after curing for 21 days.
You could use gold spray paint, I chose liquid gilding because I like the sheen,
and already had it. A little goes a long way and I've used it for a ton of projects. 


You can't beat the originals,
 but if you're looking for a budget friendly version this is a simple alternative
to get the look! 


Sunday, January 25, 2015

another craigslist bamboo table


I was beginning to wonder what was going on with our awesome Craigslist,
a slew of big armwahs (aka armoires) and over sized reclining sectionals popped
 up every time I checked in. 
Persistence finally paid off last week when I scored another table with a bamboo base!
 And, if that wasn't enough to make up for the lull, the sweet seller threw in another
 fabulous table because she was moving and wanted it gone!


Yes, I snagged a table with a similar style a few months ago and didn't need this at all,
what can I say, it was a steal at $50 and I caved! 
I love the collected look of a traditional piece paired with my more modern sofa, and the
 curved top against the straight lines. It's a large side table size (30" diameter) vs a lower
 coffee table, but I'm all over it unexpectedly pulled up to the front of the sofa. 


This solid wood Thomasville table is in great condition, except for few scratches you
can see on the base that will be an easy fix. Big and functional with a shelf inside,
 and that burl like finish...love! I think I've even got a spot for it. 
And, free :)


Have you scored anything you couldn't pass up lately? :)


Wednesday, January 21, 2015

ikea strandmon chair


With all the hoopla in December I accidentally skipped my Ikea favorite for the month.
I'm catching up with The Strandmon Wing, one of my favorite chairs!
Not too soft, not too firm - just comfy.
Not too formal, not too modern - just stylish. 
Not too pricey, not too cheap - just reasonable.

Svanby Gray 
Also available in Orange and Dark Blue
$279
Of course, I love the versatility, it goes from nursery to playroom to living room.

lucygoughstylist.com
 cuckoo4design.com
 apartmenttherapy.com
 emilyaclark.com
flickr.com
aroofoverhead.com

I love this clever DIY, the chair was converted to a rocker for a nursery.

 mydesigndump.blogspot.com
mydesigndump.blogspot.com

 If you're an Ikea fan you can find more of my favorites here,
and if not, you might become one when you see these awesome items:

Brimnes Bed
Black & White Eivor Throw
Henriksdal Chair
Salong White Vase

Monday, January 19, 2015

Refresh magazine shoot details

Hope you all enjoyed the long weekend! 
I intended to share some of the details of our dream come true
BH & G Refresh magazine photo shoot
with you last week, and every time I sat down to write the words just wouldn't flow,
storytelling and writing aren't my forte. I like short and sweet - a year in the making,
and three jam packed days with a magazine crew at our home is tough to condense, and
 after using the word 'exciting' repeatedly it kind of loses it effect!
Here's the scoop... 

November 2013 - I received an email from BH & G Field Editor, Bonnie Broten,
saying, 'I've been stalking your blog and think your home should be in a magazine.' 
Of course, I immediately thought it was a joke from a friend or teenager! 
After Googling her, and realizing she was for real, I was beside myself and then panic
 set in as I began focusing all that was unfinished in our home.      

Our dream team...Bonnie Broten - BH & G Field Editor & Stylist, Kim'Berly' Gavin - Photographer

I worked with Bonnie over the next several months sending photos of our home and
tweaking them for her to present. I tried way TOO hard to redecorate as much as I could,
so it would be magazine worthy - only to end up hating the photos I sent. That gallery wall
below is so not me, (not to mention the empty frames, like I thought they wouldn't notice??)
 What was I thinking with those taxidermy twins?
 They wanted an article on 'How NOT to decorate with a trend' - I nailed it with the framed
 taxidermy on two walls - oh my!
Lesson learned: If a magazine contacts you they like your house as it is!

   
June 2014 - After a LOT of hard work on Bonnie's end, putting together a presentation
for submission to the editors and waiting for the process to unfold, she lets me know they've
 chosen our home. EEEEK!! They'll be scheduling a photo shoot in September and it will
include our exterior and yard, as well. Yikes! Guess we'll be spending some weekends
in the yard! Lots of back and forth and photo shoot dates changing, now scheduled for
 August - at one point they called on a Thursday evening and asked if they could come on
Monday. I said, 'Yes!' Thank goodness it didn't end up working out on their end.  

August 27th - SO excited and nervous! I pick Bonnie up at the airport, she's tall, a classic
 beauty with that effortless style, her blond hair pulled back, red lipstick, truly beautiful
 and she immediately puts me at ease. We head to the wholesale florist, sit in the car and chat
 for at least an hour before heading inside to choose flowers for all the rooms and shots.
  It's late afternoon and we drive through Wendy's on our way to my house, where we arrange
all the flowers and she styles every shot, her talent and energy are impressive and endless!
Whew, long day and I take her to her hotel.
 

August 28th - It's going to be a challenging couple of days we have intermittent rain
and clouds, except when we have blinding sun. None of which seemed to bother our
incredibly talented (and buff) photographer, Berly, a dog lover, who made fast
 friends with our girl Rio and is responsible for her magazine debut! :)
 I'm sure my sweet friend, who came to help each day, never imagined she'd be
 spending her morning blow drying our flagstone patio to remove the water!


August 29th - Another full day - we covered, uncovered, and re-covered furniture,
swept water off the deck several times, and  hauled flowers to the garage and back
out again, over and over to keep everything from getting soggy. While waiting for
the weather to cooperate Berly would set up inside shots.
 

 The article in the Spring edition of  BH & G Refresh, 'Evolution of a Landscape'
 is eight pages (so exciting) of the exterior of our home, yard and deck. I took this
 photo after they had it styled and ready to go.


Part Two of the dream come true and secret I've been keeping...
our interior will be featured in the Summer edition of Refresh!  
Crazy and still unbelievable!


I can't thank Bonnie and Berly enough for all of their hard work, they were a joy to
have at our home and we feel so fortunate they were the ones we got to share this
 once in a lifetime experience with! 
  Also, thank you Mr. Simple for all of your efforts getting everything in shape
 and putting up with me! :)  


Tuesday, January 13, 2015

diy lined envelopes

Oh my gosh, you guys, thank you a million times for all the kind 
words here and on Instagram on our BH & G Refresh magazine feature!
Your heartfelt excitement for us is so amazing, thank you!!       

This is one of those super easy - super quick - super inexpensive diys I love!
I've had this on my list for awhile, and thought to do it when I was sending out 
thank you notes recently.    
Pretty lined envelopes add that extra bit of flair to ordinary stationery and it gives
them some extra weight for a higher end feel, too. 


I found the pink and orange note cards at Homegoods and used coordinating gold and
 white wrapping paper for the liners, and scrapbook paper with these more masculine cards
 I found at Target for Detail Boy.
 Yep, I'm that mom that insists on sending a formal thank you note. 


The super easy instructions: 

1) Align the envelope on your paper and trace around the outside. 


2) Cut out the liner template, trimming just inside the edges on the side,
and trimming 1/2" off the bottom, this allows the liner to fit just below the
glue on the envelope.


3) Slide the liner into the envelope 


4) Fold the liner down, creasing and glue the backside to the envelope.


It took me longer to write these instructions than do an envelope! 


Of course, the fun part is checking your wrapping paper and scrapbook stash
and coming up with cute combinations. 

I almost forgot, when I mentioned to my friend I was making these she said her
goal was to take a few hours to purchase/organize birthday cards for the entire year.
 She puts a sticky note on it with the greeting she'll be writing, it's her way of
 making it easy to send them out. Wow, to be that organized!!  

Do you have any awesome system to share? 


Sunday, January 11, 2015

BH & G Refresh Magazine


I'm starting 2015 feeling blessed and refresh-ed!! 
I've waited sooooo long to share this fun news with all of you! Over a year ago I
 was invited to send in some photos of our little old house for a possible feature in
 Better Homes & Gardens Refresh magazine.
 Long story short, we couldn't be more thrilled and incredibly grateful seeing
  our home in their latest issue.

If you follow me on Instagram you've already seen this pic I posted yesterday
while we were reading the magazine...again...and rooting for our Denver Broncos. :(  
Thank you so much for all the kind words you left, your excitement for us is heartwarming!

Refresh is a Better Homes and Gardens Special Interest Publication,
published quarterly, this is the Spring 2015 issue.   


It was an adventure!
Later in the week I'll be sharing more details about our photo
 shoot and the fabulous ladies we had the opportunity to work with!     
  

Wednesday, January 7, 2015

2014 Project Highlights

Happy New Year, friends!
 Oh my gosh you guys, I didn't intend to take such a long blogging break. 
Today is our first day back to school, our kiddo has been out since December 18th and
 we didn't waste any time getting into vacation mode. We thoroughly enjoyed a lot of
entertaining and get-togethers with friends, a beautiful white Christmas with our extended
 family at my parent's home, innumerable days lounging, eating, watching football
 and hockey, hitting the mall for returns and after Christmas shopping, ski days, 
sleeping in, and today reality hits with our 5:30 am wake up!  

Here's a quick recap of a few of the popular projects I shared in 2014....


The reveal included stripes in the closet and this DIY TanzaniaWallpaper Knock Off.
    

Also, part of the Foyer Reveal was this $45 knock off that replaced our 
lovely boob light! :)


Last June I helped with the decor for my nephew's Pretty Peach Wedding


Summer Spiff Up using thrifted finds!


Fresh Modern Teen Girl's Room a fun project for a client.


Thank you so much for following along all year, I so appreciate your enthusiasm
 and encouragement each and every day!
 I've got some exciting news, and can't wait to share it with you on Friday! :)    


Related Posts Plugin for WordPress, Blogger...
 
Pin It button on image hover